Using Microsoft's Report Builder
Create Customised Reports
As an event organiser within the Event Entry system you can run ‘standard reports’ or create and run ‘custom reports’. Custom reports are CVS extracts that open in Excel.
There are other types of reports like the Print Entry Form or the Licence report that produce a PDF formatted report.
These second type of reports are created using a Microsoft tool called Report Builder.
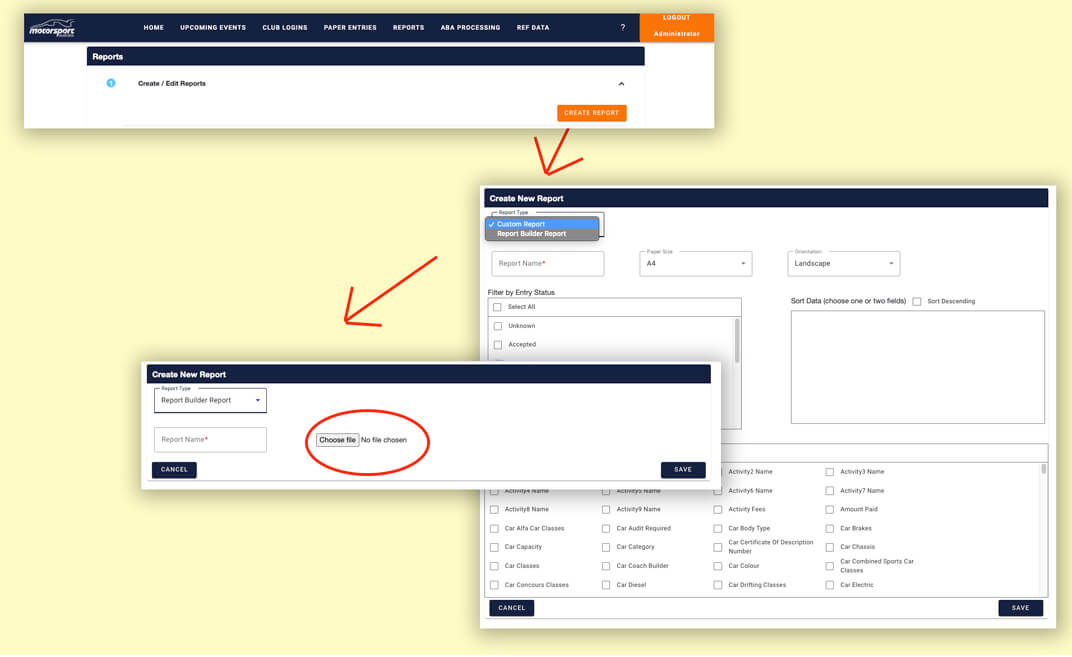
Report Builder is a WYSIWYG tool form designing reports. It produce a file (with a suffix of .RDL) that can be loaded into into the Event Entry system as an administrator, using the Reports screen as MSAAdmin shown below:


Overview
We use two main types of reports:
a) a tabular report such at the exiting Licence report, showing each record as rows in a table, and
b) a forms report such as the Entry Forms report, showing a single record per page formatted like a ‘form’ to be filled in.
Report Builder is a powerful reporting tool that runs on your computer which can be used to create an extensive array of reports, including tables, lists, charts, gauges and maps, but we are going to concentrate on the two mentioned above. We supply two ‘templates’ which are copies of the existing Licence and Entry Form reports. You can choose to use one of these templates, saving as a new file, or create a report from scratch.
Once a report has been designed you load the resulting file up into the Event Entry system. This method ensures that security is contained within the Event Entry system.
But before you start you will need to set up your development environment. Below we give you instructions on how to download and install Report Builder, get a copy of the templates, how to use Report Builder to create your own reports, and how to upload your new report into the Event Entry system.

Environment Set Up


Download Microsoft Report Builder:
- Click the DOWNLOAD button on this link.
- Run the downloaded installer file by double clicking on it.
Download the templates:
- Click this link to download a zip file of templates.
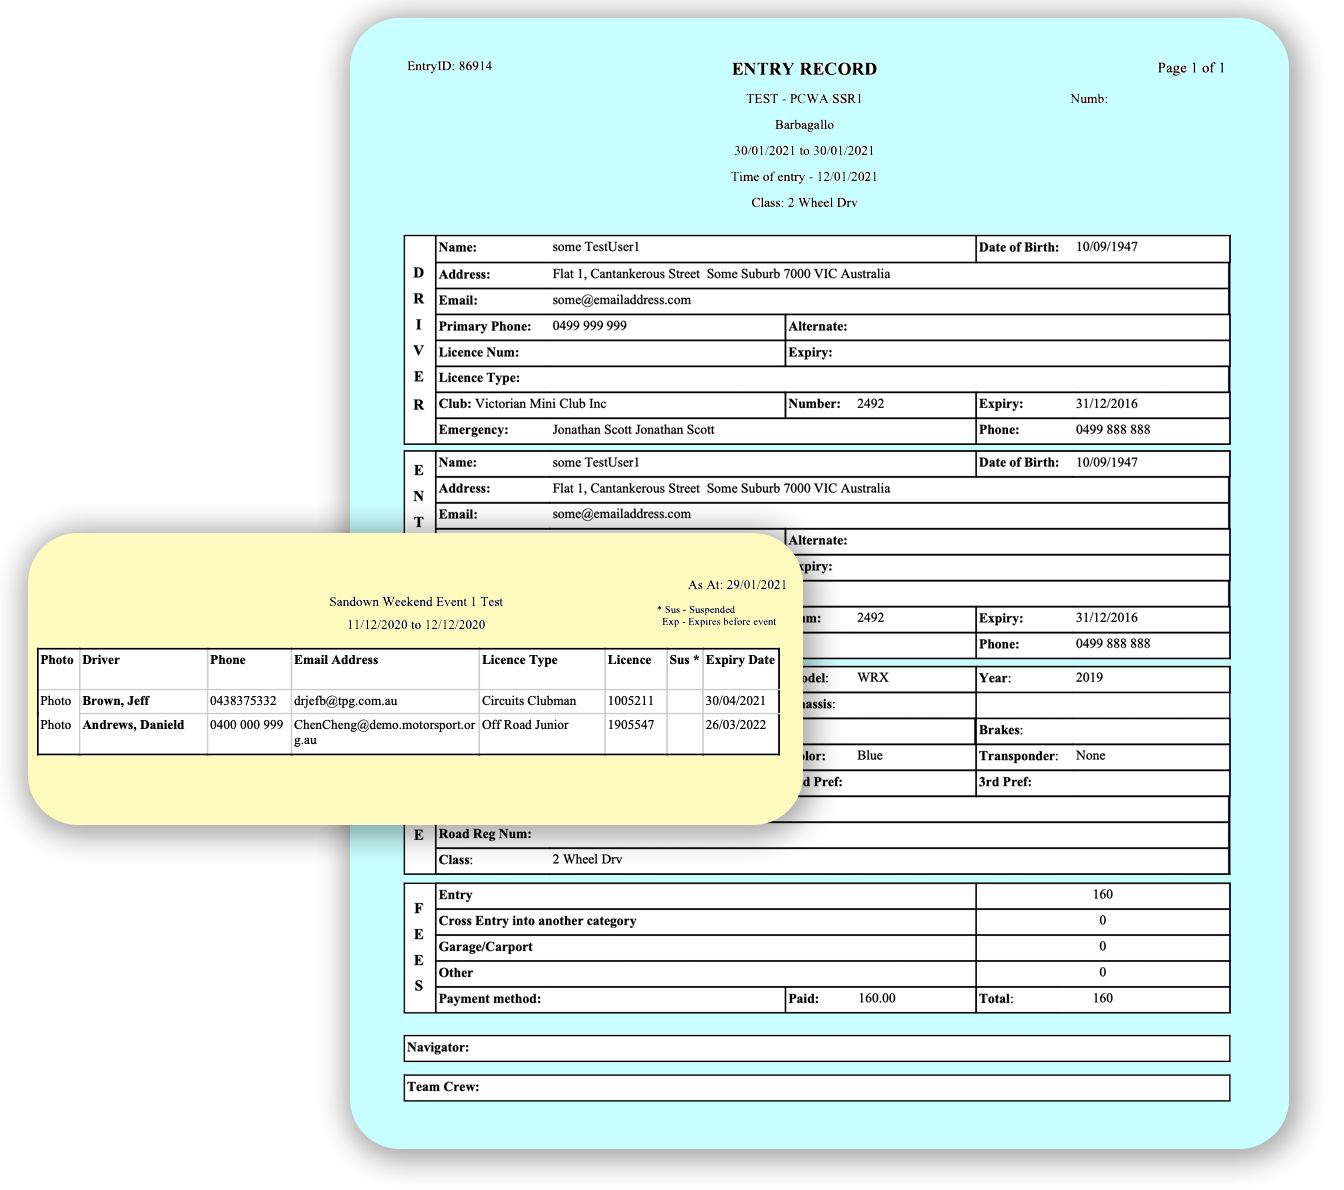
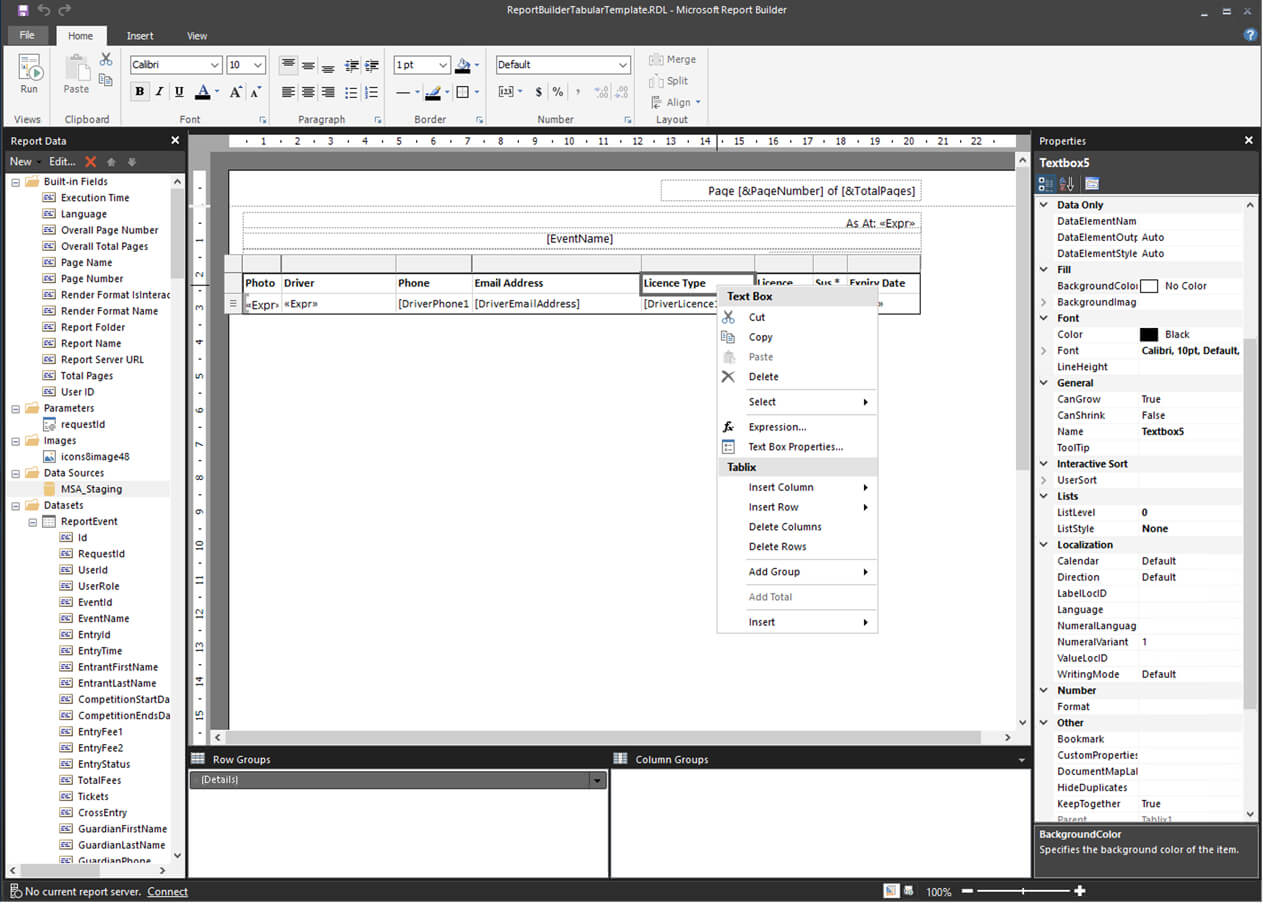
- The ‘Form’ template will create a report like the blue one pictured here, and the ‘Tabular’ one will produce the yellow one.
Explore Report Builder
Open a test file:
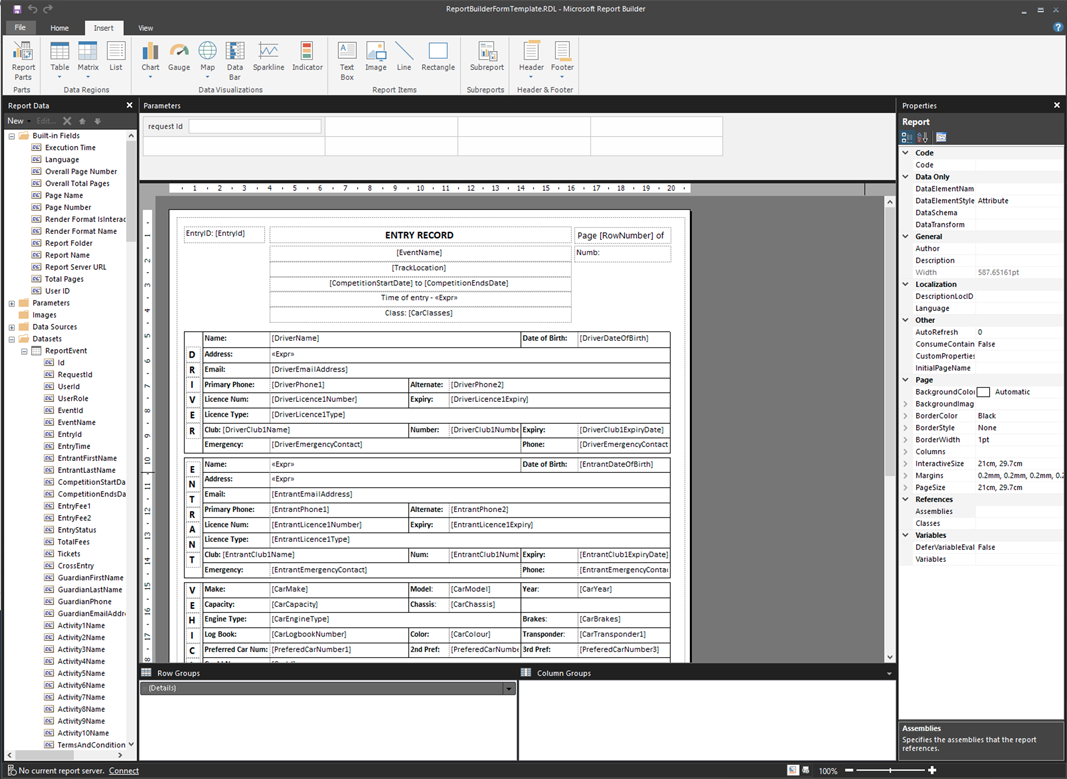
- Double click on the template you wish to clone from which will open up Report Builder, show to the left.
- Click File -> SaveAs and give it your new report name.
In the Center Panel:
- Is where you design your report.
- Right clicking on a fields to modify the report in a similar way you would with other Microsoft tools, like MS Access, Excel or Word.
Top Menu:
- The Home tab has standard formatting controls.
- From the Insert tab you can add tables, lists, charts, graphs etc.
- From the View tab you can define which of the panels mention here are displayed.
Left Panel:
- Shows the available fields to be added to your report design, including build in fields like page number, parameters passed in from the calling program, any images such as icons, where to get your data and how to filter and sort it.
Right Panel:
- The right hand panel show details about field currently selected in the center panel.

Datasets and Data Sources
Data Source:
- The Data Source in the left hand panel defines which database the data will come from.
- The Connection String field is an Azure SQL Server database connection string allowing you to dynamically access the database while designing your report.
- You don’t need a connection string. We have preloaded into the templates the database record definition.
- (NOTE: For performance reasons the ‘flattened’ database table is no longer populated, so programming work would be required to give dynamic access to Staging data.)
Datasets
- These are the database record definitions available.
- Only one is available at this time, which Is the ReportEvent dataset that is a view of all entries into an event. This is the same view that Custom Reports use.
- Other datasets can be setup. The Event Entry system currently only has the ability to call reports with the ReportEvent dataset.
Filtering data:
- In the left hand panel under Datasets:
– right click on ReportEvent,
– choose ‘Dataset Properties’,
– select Filter,
– press Add,
– enter a filter criteria using the names of the fields in dataset. - NOTES:
– Use single quotes when defining literals.
– Use the percent character to indicate wild card characters.
– e.g. The following is a valid filter:
EntrantLastName like ‘Smith%’
Sorting:
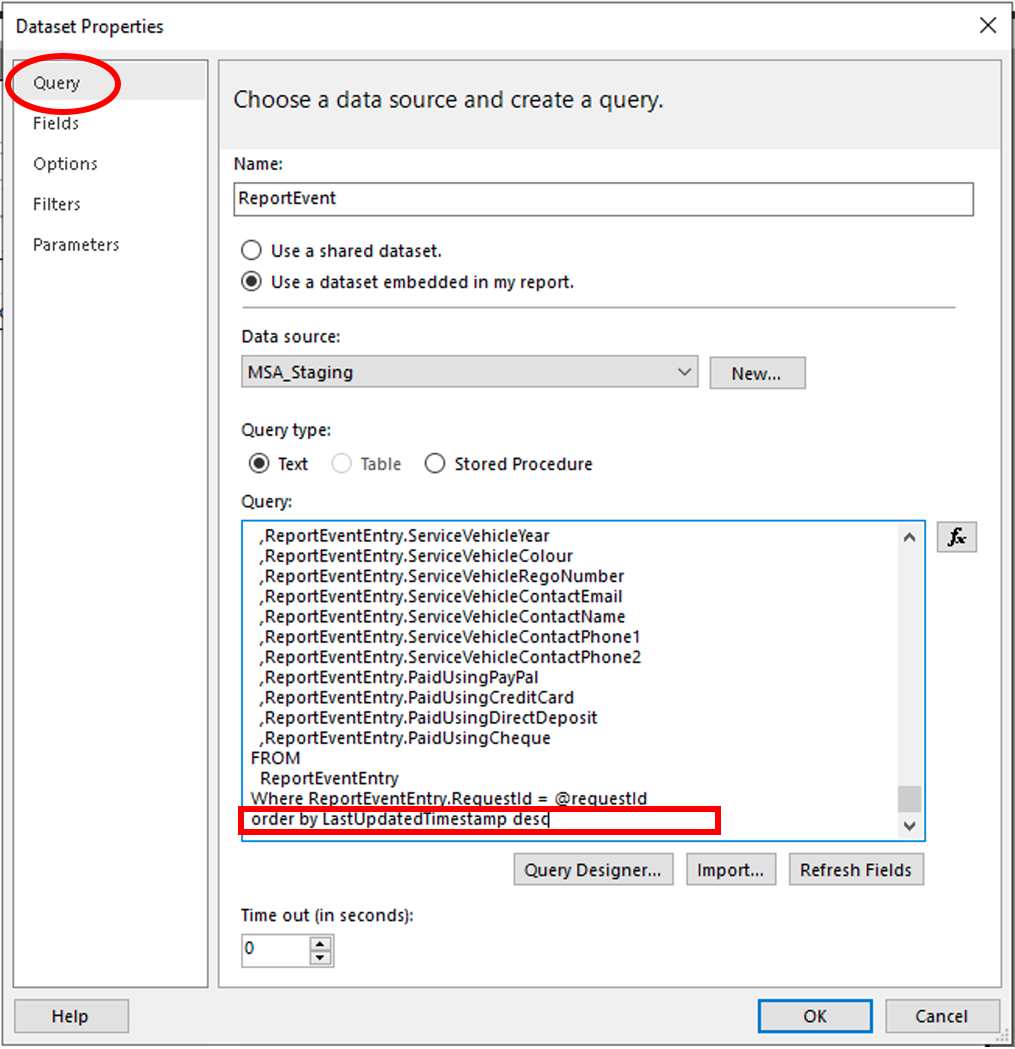
- Select Query rather than Filter in Dataset Properties.
- At the very botton the existing query statements add an SQL sort statement like the following:
order by LastUpdatedTimestamp desc
where ‘desc‘ means ‘decending’



Upload Report

Saving the report:
- Select File -> Save in Report Builder and save the .RDL file to your local disk.
- Keep this file safe as you are likely to want to edit again.
- When you are completely satisfied with your report email it to support@melbappdev.com and we will store it in the code repository.
Uploading to Event Entry:
- Log in to as MSAAdmin.
- Select Reports -> Create Report.
- Select report type of Report Builder.
- Give it a name and upload your .RDL file.
To run the report:
- Log in as an event organiser and the report name you entered will be in their list of available reports.
